1
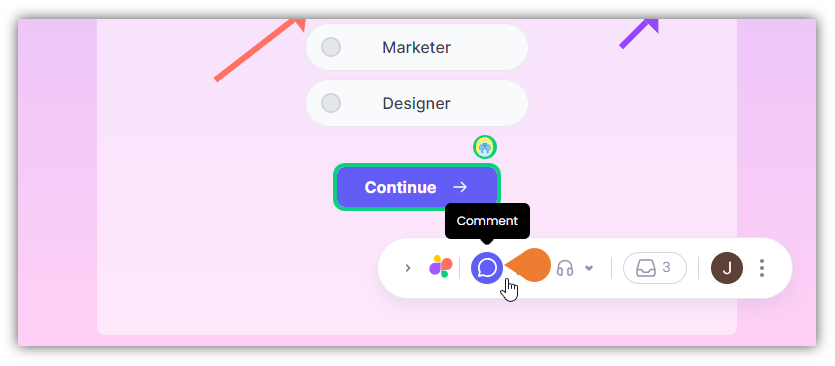
Find the Superflow Toolbar and click the Comment icon
2
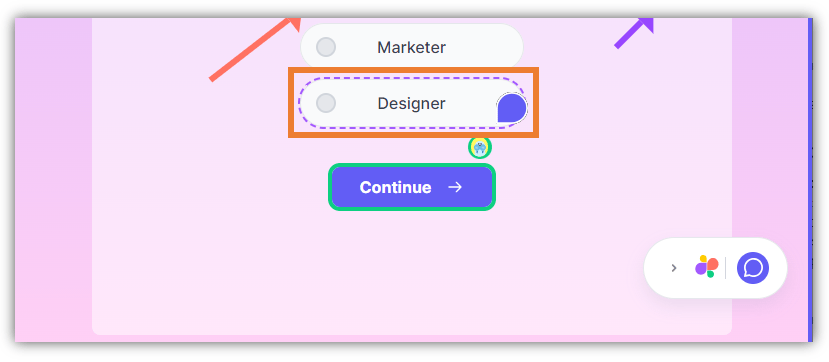
After clicking the icon, click the Element you want to comment on,
when you hover your cursor on an element, it will appear as a Comment icon which signifies that you selected the comment feature.
3
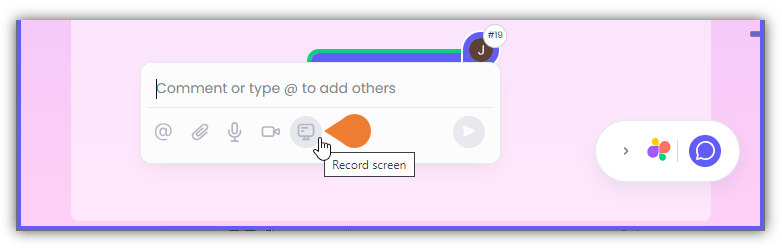
The Comment Box will appear, click the Screen Recorder icon to select it
4
A Recording window will appear
Click the Start screen recording button to begin screen recording.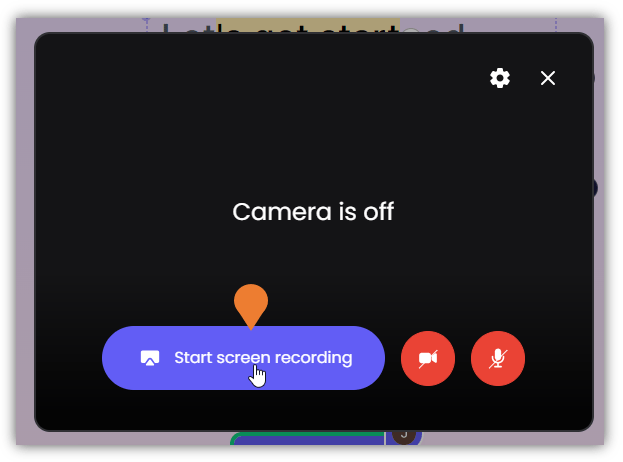
5
A new window will appear, find and click the window/screen that you want to record…
A new window will appear, find and click the window/screen that you want to record and click Share.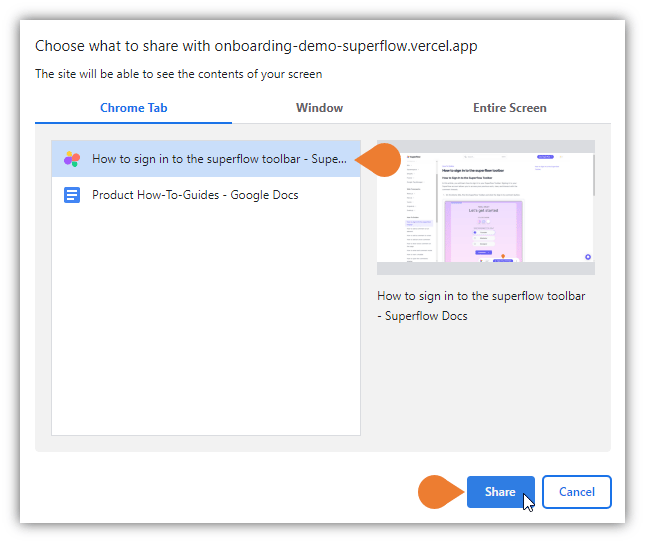
6
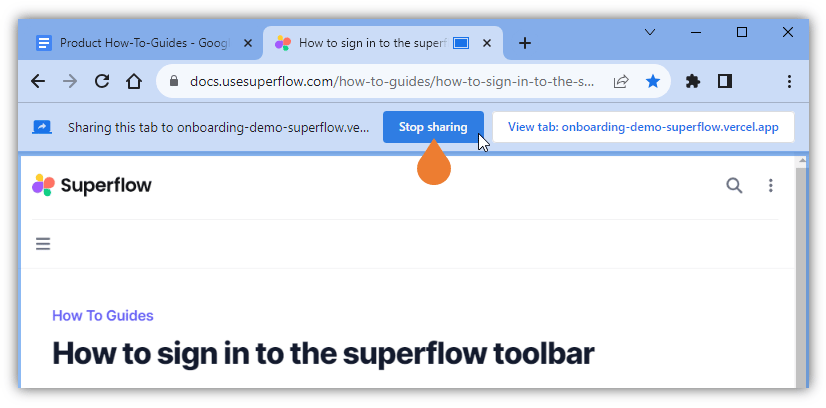
To complete your recording, click the Stop sharing button to stop the current recording
7
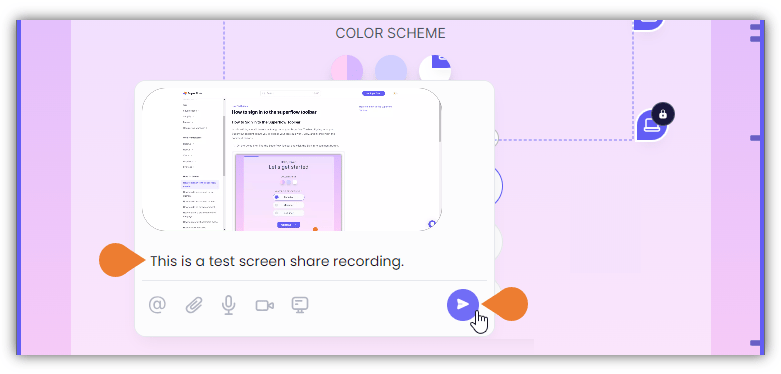
You can add a comment or note in the Comment field…
You can add a comment or note in the Comment field and click the Post icon to save the screen-recorded comment.