

Agents are currently in Beta. Each run consumes credits from your workspace balance, and the exact cost is shown before you confirm the run.
1
On the Superflow Dashboard, click Agents in the left sidebar to open the All Agents page
Find the agent you want to run and click the Play icon on the right side of its row.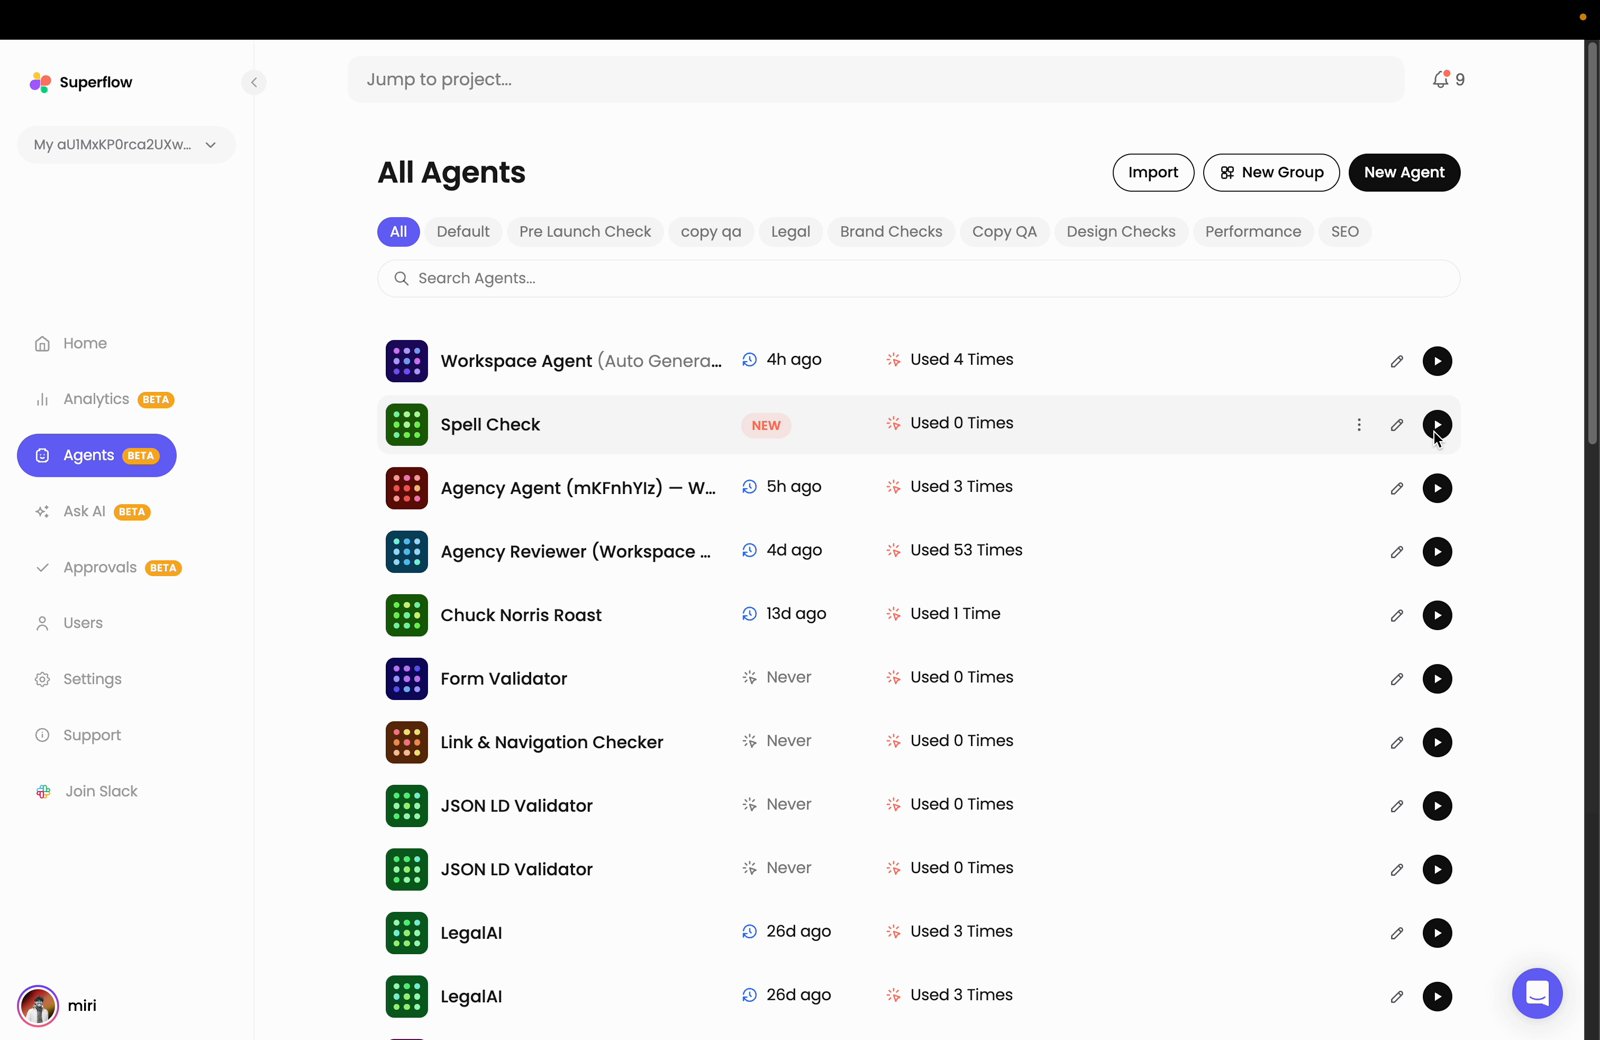
2
The Run dialog will appear, named after the agent you selected
Configure the run using the options below, then click Run Agent.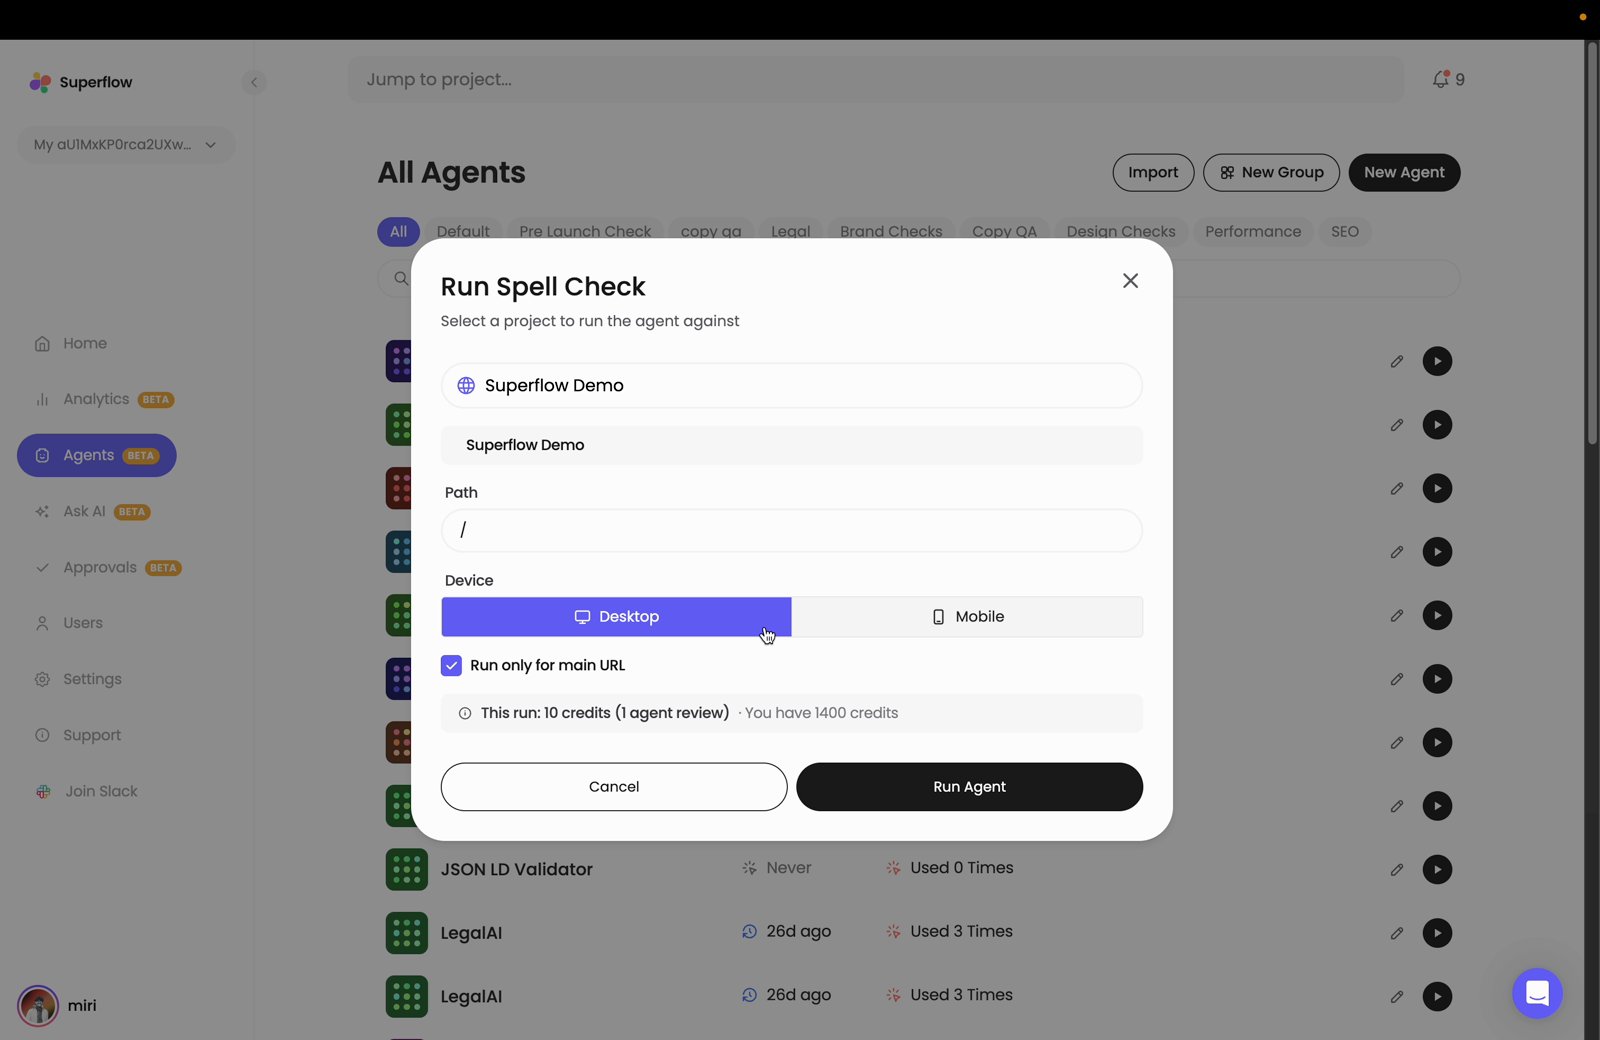
1
When the run finishes, the results panel opens on the right side…
When the run finishes, the results panel opens on the right side, named after your agent. In this example it is Spell Check Results. Each entry is a single run, showing the project it ran against, when it ran, the device used, who triggered it, and the number of findings. Click an entry to expand it and review the findings.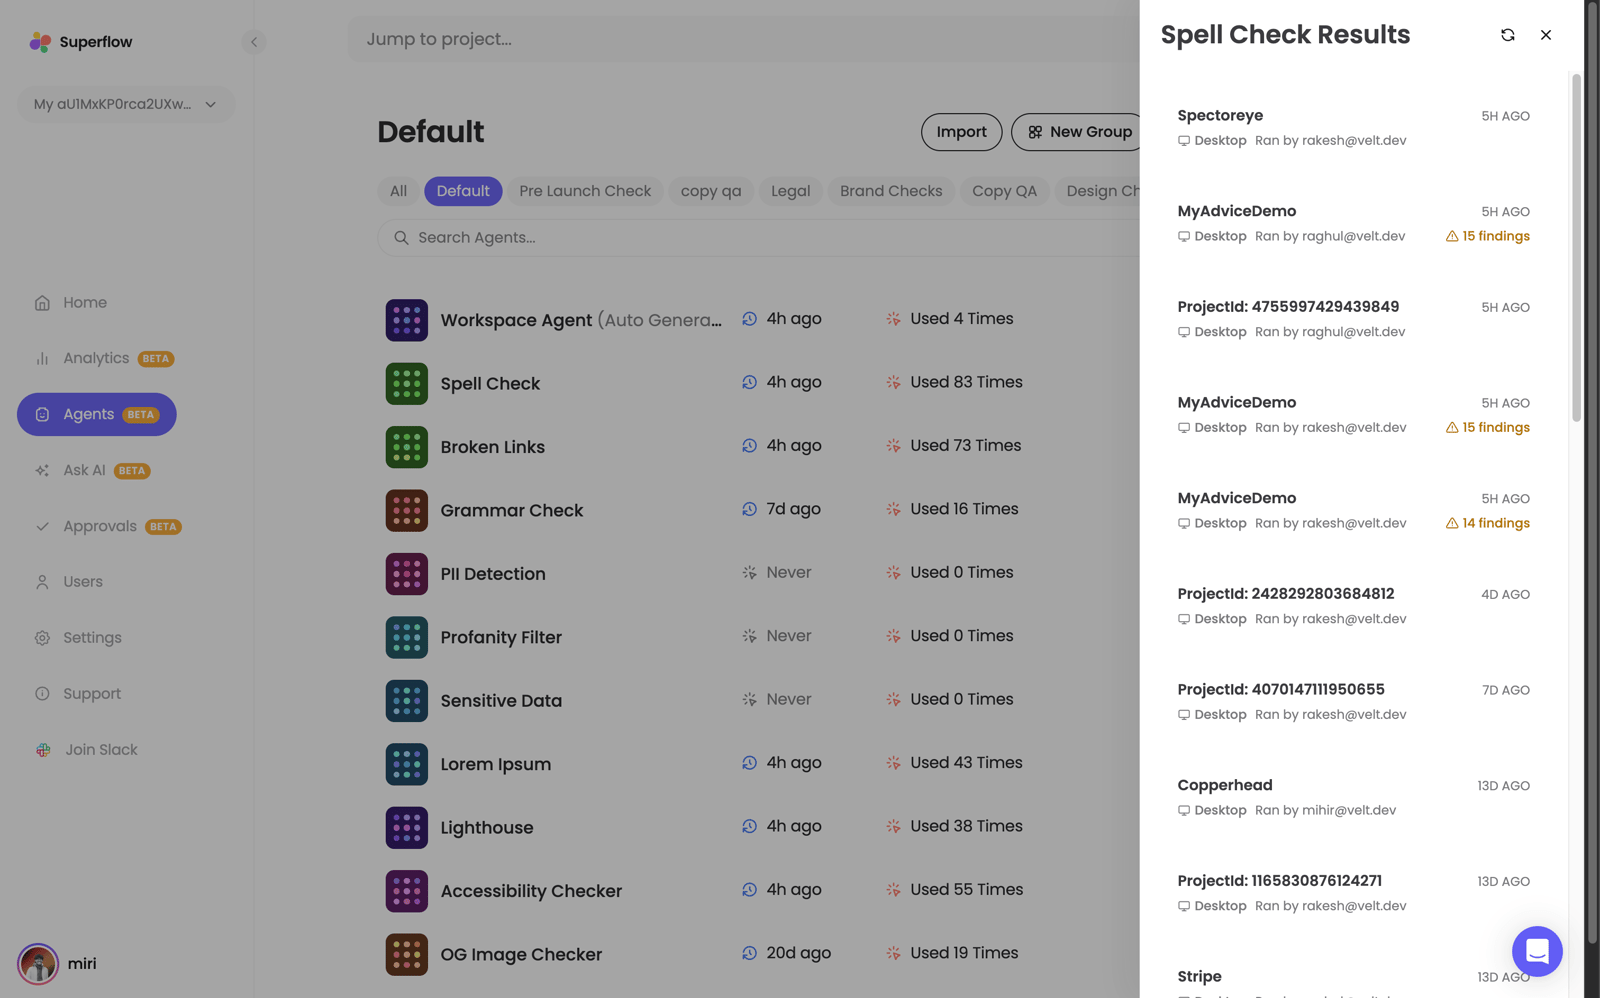
The panel keeps the history of every run for that agent, so you can compare a new run against earlier ones. If a run could not complete, it is listed with an error instead of a findings count.